Knit Santa's Boot - Instructions for a Christmas Stocking

- material
- foreknowledge
- Knitting pattern - Nikolausstiefel
- decorative cuffs
- template
- Edge with mouse teeth
- shaft
- heel
- Sternspitze
- hanger
Advent is the time of bestowal and snacking. Starting with the advent calendar over the Sunday gingerbread to Christmas, there are many opportunities to indulge each other. On the 6th of December, Nikolaus will also be visiting. He fills the Nikolausstiefel with great treats. How about if he would find a pretty, homemade Christmas stocking for this year ">
Not only on 6.12. is a beautiful Nicholas boot an asset to home and gifted. In some families, there is a similar tradition also at Christmas: It is also hung in the evening, the Christmas stocking to find him the next morning full of sweets and small gifts. This shortens the waiting time until the mess. The Santa boot, which you can knit using this guide, is perfect for both occasions. In the typical Christmas colors, it offers plenty of space for sweets. In principle, the instructions are very similar to conventional socks. Only the exact measure is not important here. It is also the perfect training stocking for beginners!
material
You need for a Christmas Stocking:
- red wool
- white wool
- Needle match to the wool
- wool needle
- possibly crochet hook

There are no strict guidelines for the wool you use in this manual. Maybe you still have leftovers from other projects that can entangle you ">
foreknowledge
for a Santa's boot:
- Circular knitting with double-needle play
- right stitches
- left stitches
- envelope
- Knit 2 stitches left / right together
Certainly it is not bad if you have already knitted one or the other socks before. However, the beauty of this Santa boot is that he does not have to fit a foot in the end. Therefore, he forgives many beginner mistakes that would limit the comfort of a real pair of socks.
Knitting pattern - Nikolausstiefel
decorative cuffs
You start the Christmas stocking with a decorative cuff in white. The cuff pattern consists of units of 13 stitches each. Therefore hit 4 x 13, ie 52 stitches. Close the stitches in a round and knit the first round with left stitches.

template
1st sample round:
In the next round already begins the wave pattern. For this knit 4 stitches on the left. This is followed 6 times first by an envelope and then a left stitch in turn: the envelope, the left stitch, the envelope, the left stitch, the envelope, ... The last 3 of the 13 stitches on the needle are knit again on the left. Repeat this procedure for all 4 needles.
2nd sample round:
In this round all left stitches of the preliminary round are knitted on the left. The envelopes, on the other hand, are knitted on the right.
3rd sample round:
Now knit 3 stitches in a row 2 stitches to the right. This is followed by 7 stitches just knit on the right. For the remaining 6 stitches 3x 2 stitches are knitted together on the right side. Repeat the procedure for all needles.

4th sample round:
Knitt all the stitches to the right.
5th and 6th round:
Knitt all the stitches left over both rounds.

Now the first wave pattern is ready. Repeat the tutorial from the first to the sixth round of patterns another 2x.

Edge with mouse teeth
When you have finished the third wave pattern for your Santa's boot, knit another round with left stitches. The next round starts with a left-hand envelope. The two following stitches knit together on the left. Over the entire round, an envelope and two stitches knitted together on the left alternate.
In the next round, knit the left stitches all on the left and the envelopes all on the right. Finish the cuff with another round of left-hand stitches.

Note: Mice Teeth set a predetermined kink point at which you fold the cuff of your Christmas stocking. The kink then looks jagged, like a series of small mouse teeth.
shaft
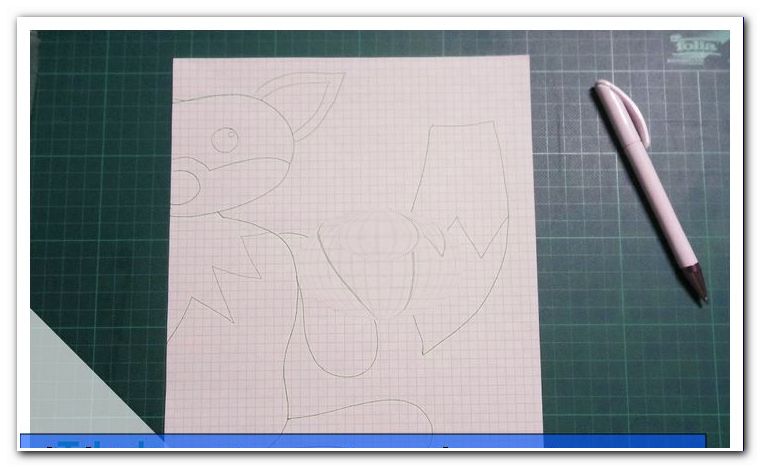
We deliberately kept the stem very simple in this manual. On the one hand, he should not steal the show from the cuff on our Santa Claus boot. On the other hand, he knits faster without a complicated pattern. The only decoration is a relief star, which results from the change from right to left stitches. In the photo you can see the template for the pattern.

Switch to red wool first. In the new color, knit 10 rounds with right stitches.

Then the star pattern for your Christmas stocking begins. It is designed so that you can place it once on the left and right sides of the shaft. For this you knit it for the first time on the needles 1 and 2, the second time on the needles 3 and 4.
Read the template from top to bottom. On the first round, knit 12 stitches on the right, then one stitch on the left and another 13 stitches on the right. The procedure is repeated for the next two needles. The empty boxes therefore mean right-hand stitches. The boxes with cross are for left stitches. Work through all 30 pattern rounds.

When the star is complete, knit two more rounds to the right before starting with the heel of Santa's Boot.
heel
The heel is a simple boomerang heel. Change back to white wool at the beginning. Follow the instructions for boomerang heels that you can find here: knit heel
The only point you omit from your Christmas stocking is the middle section. If you knit two complete rounds after the first half, you would get a white stripe. Therefore, continue in the manual immediately with the second half. It may be a bit tricky to continue working with the winding stitches, but with a little patience and feeling things are going very well.

Sternspitze
If you followed the instructions for the boomerang horse to the end, switch back to the red wool. From now on knit again in rounds over all 4 needles with right stitches. It is advisable to work out an additional stitch from the cross thread in the first round at the transitions from the 1st to the 2nd and from the 3rd to the 4th needle. Remove these two additional stitches in the next round. Knit 30 rounds with right stitches.

Then start with the top. Instead, switch back to the white wool. Knit a round with right stitches in the new color. In the next round, knit the last two stitches on each needle to the right.
Immediately in the next round knit the 5th and 6th as well as 11th and 12th stitch on each needle on the right side. This is followed by 3 rounds without declines, where you knit all the stitches to the right.
In the next round, knit the 4th and 5th and the 9th and 10th stitch on each needle to the right. In the next 2 rounds knit all the stitches right without declines.
You should still have 8 stitches per needle. Of these, in the next round the 3rd and 4th as well as the 7th and 8th are knitted together on the right. It is followed by another round with right stitches.
In the penultimate round you knit the 2nd and 3rd as well as the 5th and 6th stitch per needle. Immediately following, on the last round, knit the 1st and 2nd, 3rd, and 4th stitch on each needle to the right. There are a total of 8 stitches left.
Cut the thread and thread it into the wool needle. In turn, pull the thread through all 8 remaining stitches and remove the knitting needles. Pull the thread tight and use the wool needle to cut through the middle of the 8 stitches on the inside of the Christmas stocking. There you sew the thread.

Also sew all other remaining thread ends on the inside. You have finished your Santa Claus boot.
Tip: Personalize your Santa's boot and embroider the name of the owner on top.
hanger
If you want to hang the Santa Claus boot, it is recommended to attach a sturdy strap to the cuff. Crochet a chain of white wool with about 10 stitches. Crochet a series of tight stitches over it. Pull the two ends above the heel through two holes from the mouse teeth. Tie the ends together using the protruding threads.

Note: The Santa Claus boot is very variable. For less , fold the cuff around the edge with the mouse teeth. For a bit more , the cuff can be folded so that you can still see 2 wave patterns from the outside. If Santa Claus is very generous, do not fold the cuff, but let it stand up.