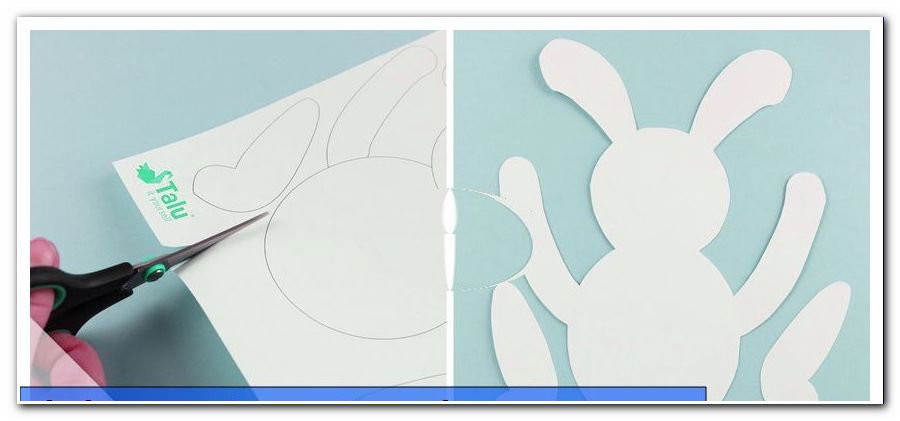
Fold origami lamp - make lampshade out of paper

- Bastelanleitung - folding origami lampshade
- Instructional Video
Origami is becoming more popular! Whether as home accessories, jewelry or even in fashion - the simple, geometric origami artworks can be seen everywhere. Therefore, we do not want to deprive you of this great origami lamp. We show you in this free folding instructions with template, how you can fold such an origami lampshade. It's not as complicated as it looks.
Be brave and dare - this paper shade is really not that difficult. Origami has the reputation that it can be complicated quickly - but with the proper guidance, these lamps are also suitable for beginners. And this is how it is done:
Bastelanleitung - folding origami lampshade
You need:
- 2 x A4 size paper
- Ruler and pencil
- bonefolder
- Adhesive tape and glue
- punch
- line
- lamp socket
Step 1: To begin, glue the two sheets of paper together on one of the short sides with tape. The origami ball consists in its width of two leaves - a sheet would be too short to close the lampshade completely.
Note: You can also glue two sheets in A3 format in this way - resulting in an elongated lampshade.
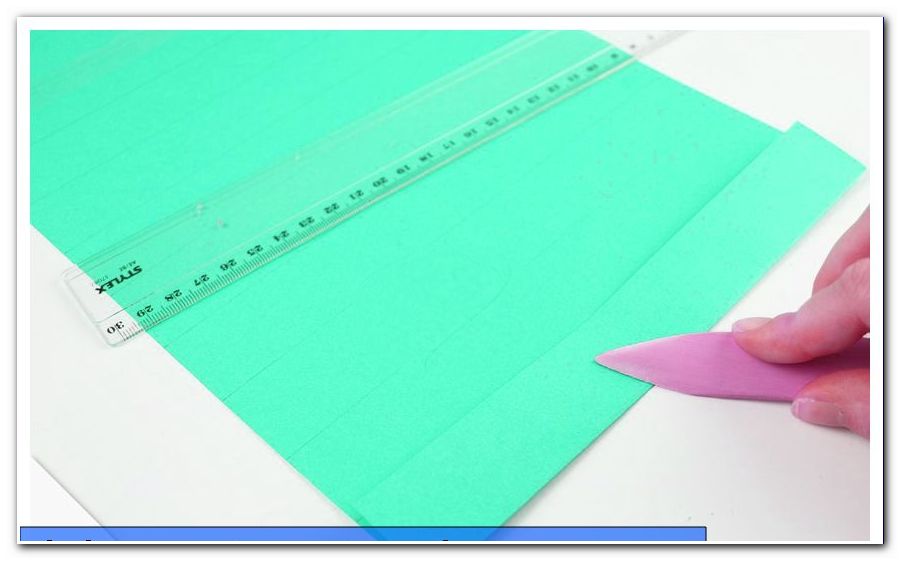
Step 2: Measure three centimeters with the ruler over and over again and then draw a vertical line. Then mark the center of both sides at 10.5 cm left and right.

The last strip of paper is not quite three inches wide. But that is not bad, because this end is glued later.
3rd step: Now it is folded. Start with the pencil lines from step 2. Fold them neatly around the ruler and then with the folder.
Step 4: Then fold the following lines that we drew in the graphic. First the blue and then the red lines. Start on the left at the center of the horizontal.
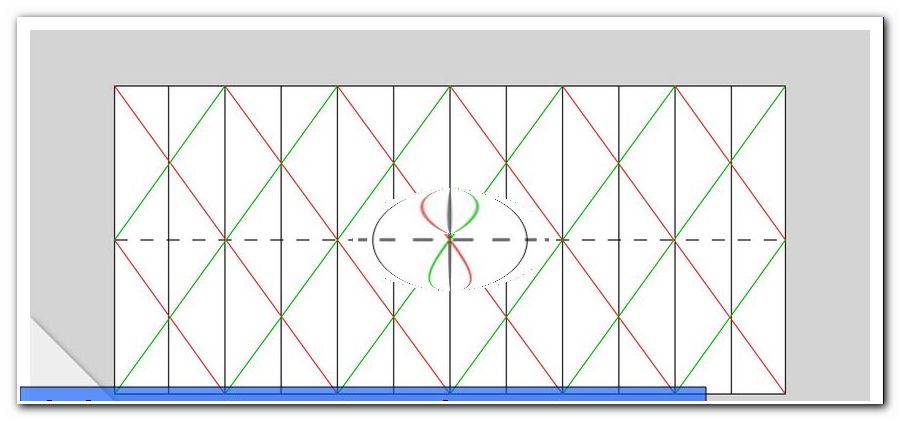
Always leave two strips between each fold. Place the ruler at the two points you want to connect to the fold and fold the paper over. Subsequently, the ruler is removed and the fold is traced with the Falzbein.

Tip: Take your time when folding - always make sure that all important fold intersection points lie on top of each other.
5th step: Now the folds on the pencil lines are folded in the other direction again. Then you can fold the lampshade even easier.
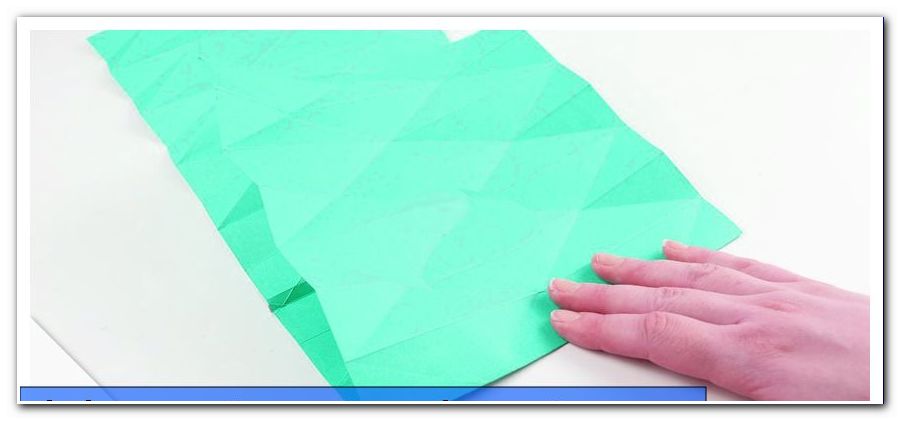
The folding pattern of the origami lampshade should now look like this:
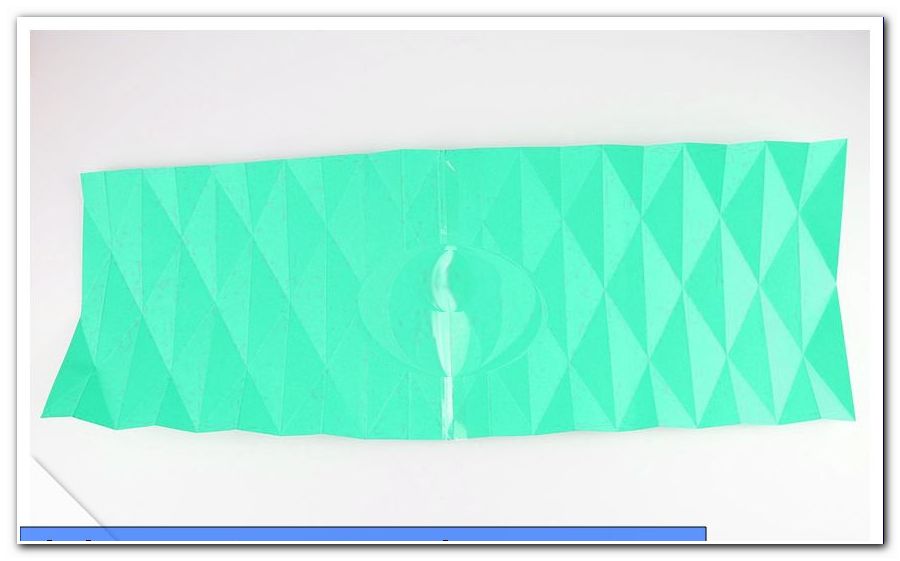
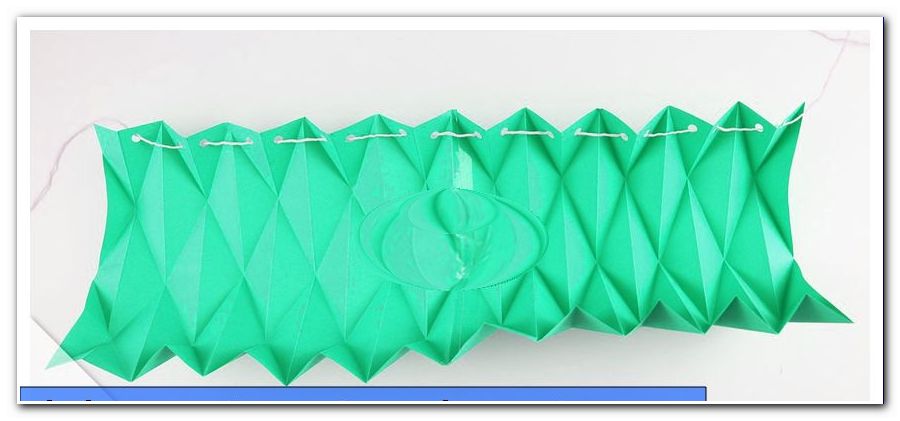
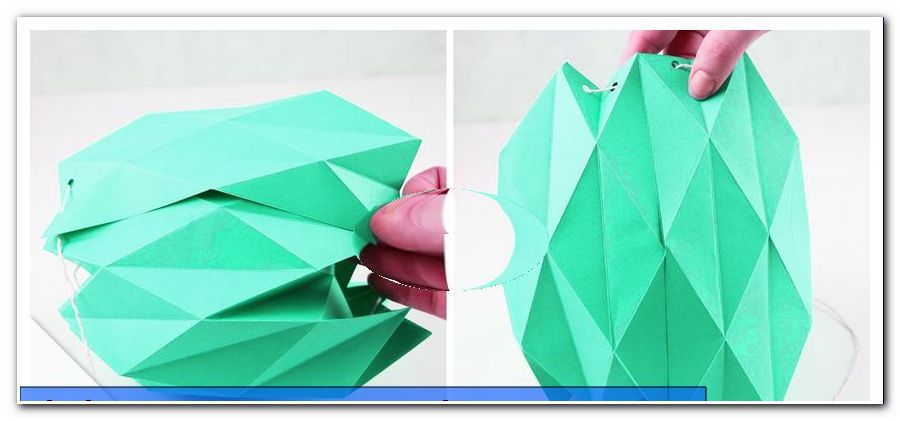
Step 6: Now, if you lead the two ends of the paper together, the lampshade will almost fold itself up. Fold the folds again and again with your fingers. The thighs of the upper and lower rows are folded inwards in the middle. In these triangles holes are now holed in on one side - always two side by side in one of the triangles.

Like an accordion you can fold it up. This is how the lampshade should look like:
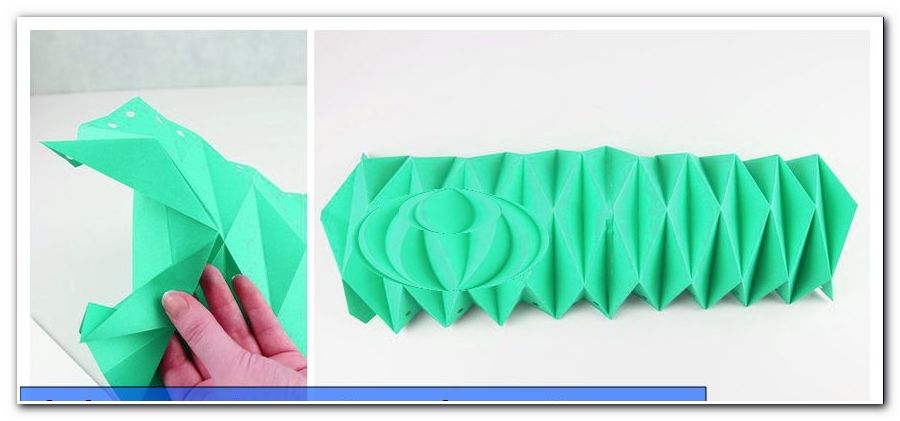
Step 7: Now cut a long piece off the string. Thread it through the holes afterwards.
Step 8: So that you can now close the shade, the two ends must be glued together. According to the folding pattern, place the two ends exactly on top of each other. The end with the end strip, which was shorter, lies inside. Now you know where to apply the glue. Then glue the lampshade together.
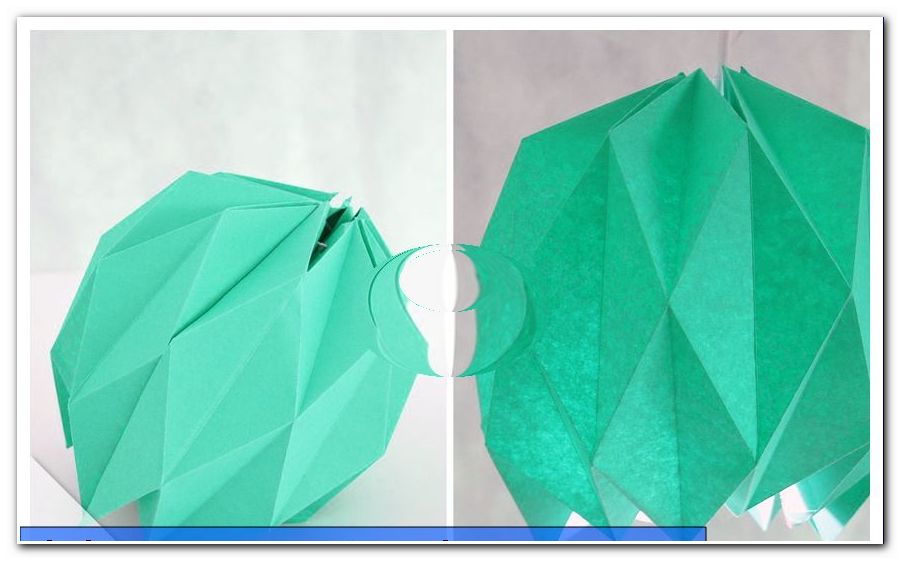
Step 9: Now the cord is pulled taut and the lampshade closes at the top. Finished!
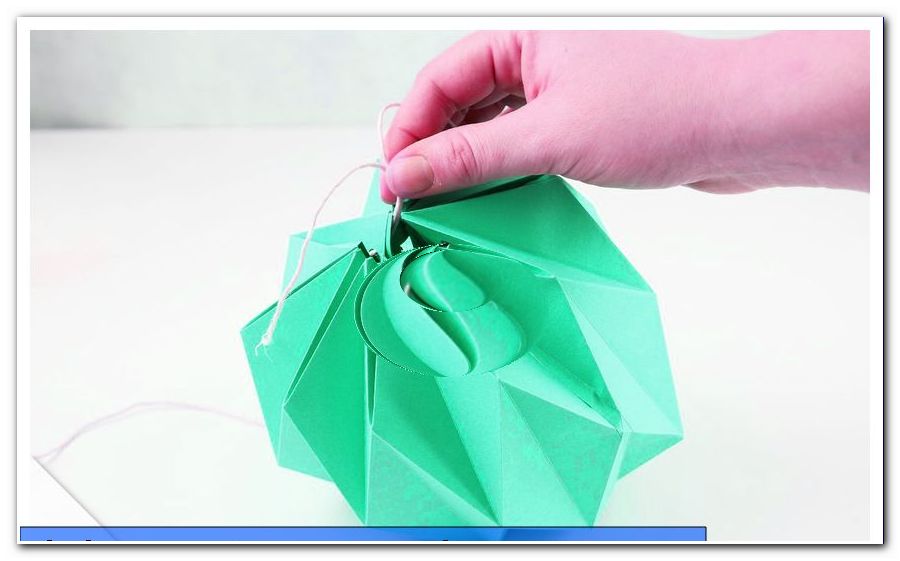
Now you can pull the lamp holder through the opening and the Origami lamp is ready for use.
Instructional Video
If you want, you can also conjure a decorative origami ball out of it. All you have to do is close the underside of the balloon - you can do this with a string or simply glue the bottom tips together.
Another way to make an origami ball is Kusudama. This technique is characterized by the fact that one builds an origami construct out of several elements. Two great instructions for such an origami ball can be found here:
- Folding origami ball from flowers
- Make origami ball