Coloring Concrete with Pigments - DIY Guide for Colored Concrete

- Concrete / cement / mortar
- cement
- concrete
- mortar
- Color pigments for concrete
- Make planter yourself - instructions
- 1. The material
- 2. The form
- 3. Color the concrete
- 4. Pour the planter
- Tips for quick readers
- Related Links
Whether table decoration, plant containers or concrete furniture for the garden, the proven construction material due to its compressive strength is enjoying increasing popularity in the DIY sector. However, since the color selection for concrete remains rather limited and the "unitary gray" has become somewhat out of fashion, there are various possibilities of color design. So if you want to put some color into the gray concrete everyday, then in this article you will learn everything you need to know about the concrete coloring with pigments.
Concrete / cement / mortar
At the beginning, the question arises as to which building material is actually the right one, because the trade offers countless varieties of craft concrete, lightning cement and cement screed.
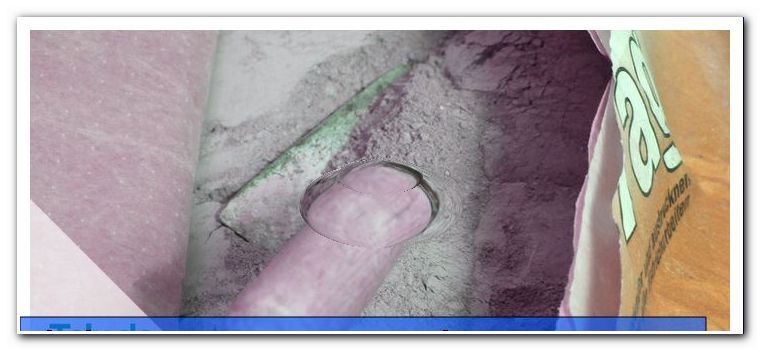
cement
Cement is the most widely used material worldwide and is mainly used as a binder. As a binder, it is the basis for concrete, plaster, mortar and other building materials as it begins to harden as a result of the chemical reaction with water. Portland cement is one of the most widely used types of cements. It is primarily used to produce concrete and is known for its typically gray color.

concrete
To make this artificial stone requires a binder, which is mixed together with an aggregate. Therefore, water, cement and a gravel-sand mixture often form the main basis for this building material. Concrete is known for its extremely high compressive strength, and the use of steel reinforcements gives reinforced concrete with a very high tensile strength.
mortar
This building material is used for building and plastering walls or laying tiles. Again, cement and water, together with sand and lime, form the basis. The different masonry mortars differ only in the mixing ratio of the individual constituents. The use decides which mortar is needed. Mortar also serves as a base for screed and plaster.
Color pigments for concrete
If you want to dye concrete sustainably, color pigments should be the first choice. In contrast to a superficial treatment by painting or varnishing, pigments allow all the concrete to be colored. This has the advantage that the concrete still retains its color even when the surface is exposed to mechanical abrasion and weathering, such as in sidewalk tiles. With a ratio of 1% to 5% of color pigments on the added amount of cement, one can influence the intensity of the colors.
Tip: Particularly intense and bright colors can be achieved with white cement.
However, adding more than 5% of pigments does not give a stronger color as the mixture is already saturated. We have tested for you three different colors with different pigment proportions and want to present the result here.
- Staining at 2% and 5% with brown pigments

- Gradient at 1%, 2% and 3% with red pigments

- Gradient at 1%, 4% and 5% with green pigments

Although we worked with different proportions of pigment, the intensity of the color gradient was somewhat lower than expected. But she is still strong enough to achieve a contrast. When using gray cement, the colors would be darker. Experiment to get the color you want.
Note: The statics of bearing components can be influenced by the color pigments.
Make planter yourself - instructions
Concrete as a craft material is becoming increasingly popular and is ideal for garden furniture, decorations or as in our example for a planter.
1. The material
Here we have listed the most important materials you need for the colored concrete bucket. Whether you mix the concrete yourself or buy creative concrete is of course up to you, but we decided to mix it ourselves because we want to achieve a strong and bright color with white cement.
- cement
- sand
- color pigments
- Protective gloves
- Respirator
- mold
- Bucket for mixing
- cover
- whisk
Tip: If you have a cordless screwdriver or a drill, you can equip it with a mortar stirrer, which makes stirring the concrete easier.

2. The form
Before you go, you need a mold. Here are no limits to their creativity. Depending on what your planter should look like, you can make an inner and an outer mold. You just have to make sure that their forms are well sealed and some distance, preferably 5 cm or more, is maintained between the molds. As a result, the planter is also stable enough in the end. It is best to use cardboard boxes or plastic trays as they can be easily removed after drying the concrete.

3. Color the concrete
When you have prepared everything, you can now begin to touch and color the concrete. Do not forget to wear a dust mask and protective gloves. This protects your skin and the respiratory tract from the aggressive fine dusty cement. Now add about 1 - 5% color pigments to the amount of cement you need. We decided to use 4% pigment:
- these were 84 g of pigment powder on 2.1 kg of cement

Now mix the cement with the color pigments so that they spread out finely. Now add the desired amount of sand you need for your concrete. The sand to cement ratio for concrete is 4 parts sand to 1 part cement. For our project, however, we orient ourselves on creative concrete and work with a ratio of 1: 2 (cement: quartz sand) .
Lastly, gradually add water and stir all the mixture until the concrete has reached the desired consistency. To pour it into a mold, it should be about as fluid as semolina pudding.

4. Pour the planter
When the concrete is ready, start casting it slowly and evenly into the mold. After pouring the concrete into the mold, you should compress the mixture a little by pressing it firmly so that no air bubbles form.

Finally, cover the bucket with foil and allow the concrete to dry for 24 to 36 hours. After drying, remove the inner and outer molds. If you want you can still work on the concrete by grinding it down.

Tips for quick readers
- Concrete consists of cement, water and a mixture of gravel and sand
- You can buy the concrete ready (expensive) or even touch it (cheap)
- Procure material
- Build and seal the mold
- Add 1 - 4% color pigments to the required cement
- 2 parts sand on 1 part cement for craft concrete
- Add water and mix well
- Pour concrete into the mold and let it dry for 24 to 36 hours
- Remove concrete from the mold and sand
Related Links
If you still do not have enough of the concrete color and maybe looking for more ideas for crafting concrete, you'll find more creative ideas and instructions here: Crafting with concrete