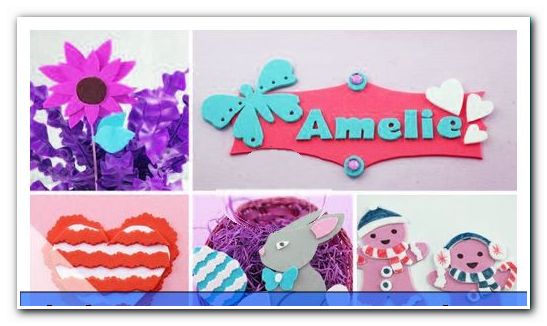
Crafting with foam rubber - 6 templates for Spring, Christmas & Co
- Sunflowers made of foam rubber
- manual
- Heart of sponge rubber
- manual
- Door labels made of sponge rubber
- manual
- Gingerbread man made of foam rubber
- manual
- Easter bunny made of foam rubber
- manual
- Butterflies made of foam rubber
- manual
- Info - crafts with foam rubber
Crafting sponge rubber is one of the easiest and least expensive ways to create great decoration elements for all sorts of occasions and seasons. The practical material can be used to create cute animals, funny characters, bright sunflowers, Christmas trees or doorplates. We present you our favorite motifs and explain how to conjure them in a relatively short time!
It's no wonder that sponge rubber is one of the most popular craft materials. After all, you can use it to produce a wide variety of accessories. In addition to the stamps, which we have already presented in a separate guide text, succeed with the elastic foam many other items that you bring in at home or give away and can tinker alone or with your children. Below we explain in detail how you can make sunflowers, hearts, door signs, Christmas trees, Easter bunnies and butterflies made of sponge rubber.
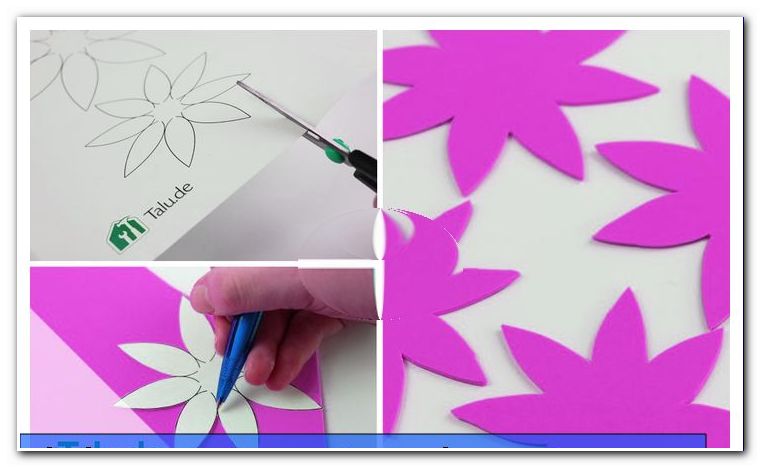
Sunflowers made of foam rubber
You need this:
- Sponge rubber in green, yellow and black
- our craft template
- Glue
- wooden stick
- thin wire
- green flower ribbon
- yellow pluster color
- scissors
- bright colored pencil or white chalk
manual
Step 1: Print our templates on paper and cut them out.
Click here: To download the craft template
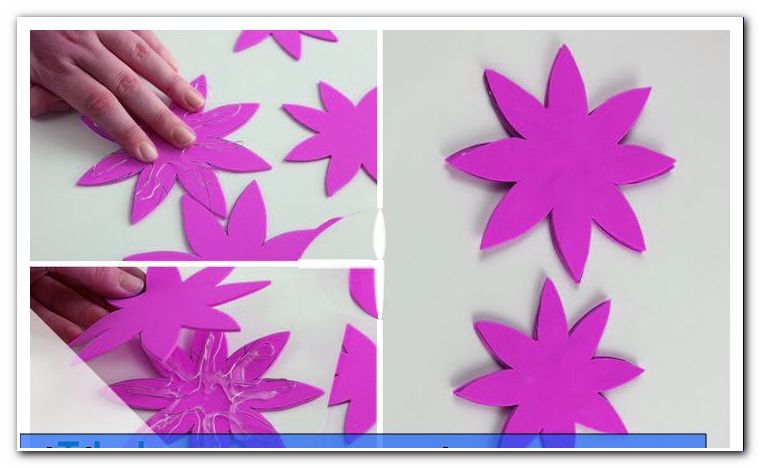
Step 2: Transfer the big and small flowers twice to yellow sponge (with a light colored pencil or white chalk) and cut them out again.
Step 3: Now take care of the big foam rubber blooms. To do this, coat the two parts completely with glue. On a part give thin wire, as our picture shows. Then place the second part of the large sponge flower with the coated side down on it. Press firmly. It's best to complain for one hour with weighty books.
Step 4: Repeat step 3 for the smaller sponge flower. It should also be loaded with a heavy object for stabilization.
Step 5: Stick the small flower in the middle of the big one. Carefully slide the wooden rod between the two layers.
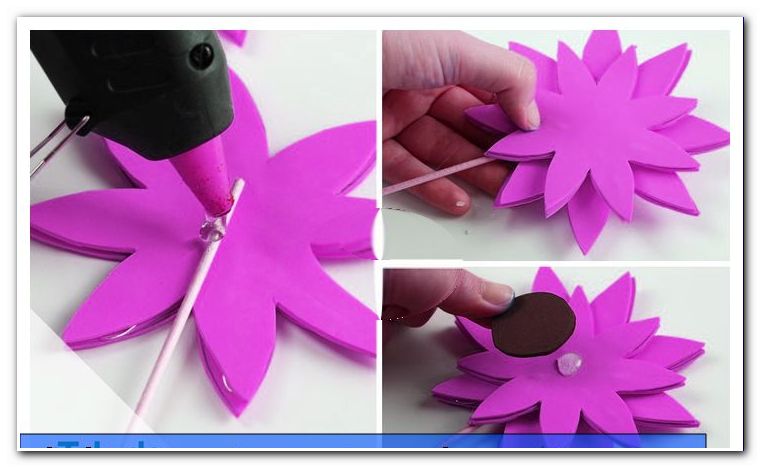
Step 6: Transfer the circular form from our templates to black foam rubber and cut it out.
Step 7: Glue the black circle onto the small flower.
Step 8: Transfer the sheet shape from our templates twice to green foam rubber and cut it out.
Step 9: Wire the ends of the two sheets together with wire and attach to the wooden stick.
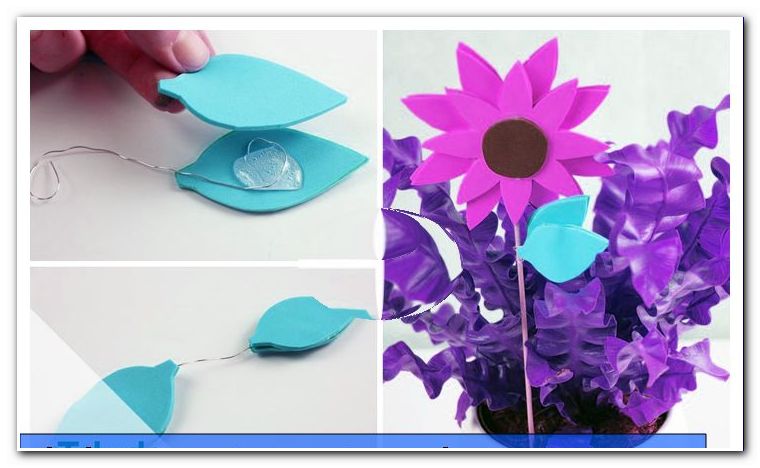
Tip: The finished sunflower (s) you can use as you wish, such as window decorations or in a pot with Steckschwamm as a more comprehensive decoration element.
Heart of sponge rubber
You need this:
- Sponge rubber in red, pink and white (or other colors)
- our templates
- contours scissors
- scissors
- craft glue
- pencil
- bright colored pencil or white chalk
manual
Step 1: Print our templates on paper. Cut out the desired motif.
Click here: To download the craft template
Step 2: Transfer the hearts to the foam rubber with a pin.
Step 3: Cut out the largest heart with a contour scissors. That creates a great effect.
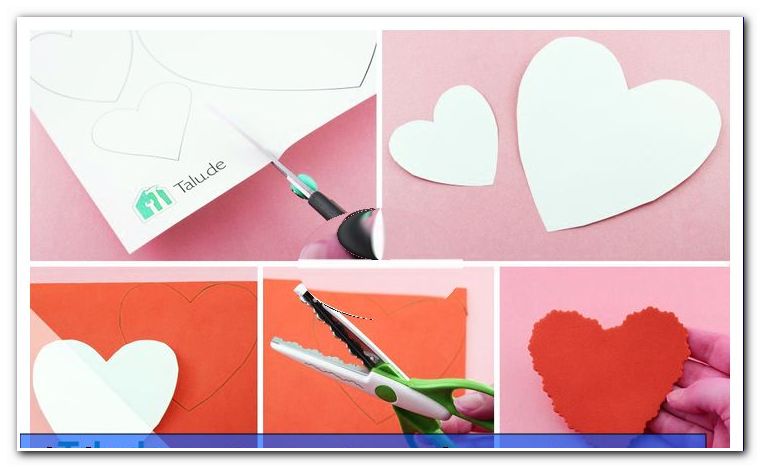
Step 4: Cut out the other hearts with a conventional pair of scissors.
Step 5: Glue two or more hearts on top of each other. Finished!
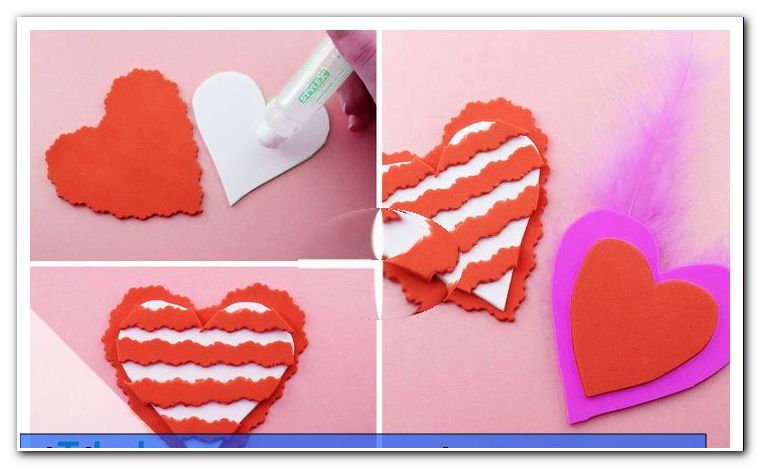
Tip: The multi-layered sponge hearts are wonderful gifts for Valentine's Day or Mother's Day.
Door labels made of sponge rubber
You need this:
- Sponge rubber in different colors
- our figure, form and letter templates
- markers
- bright colored pencil or white chalk
- scissors
- Glue
- picture hangers
manual
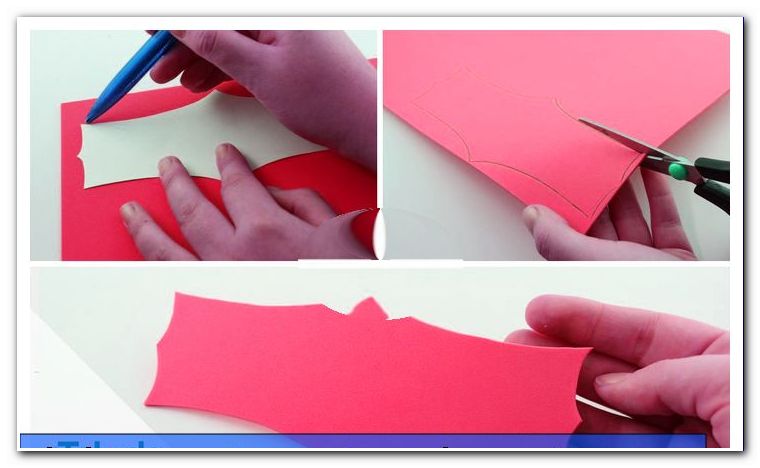
Step 1: Print our figure, shape and letter templates and cut out your favorite designs for the doorknob.
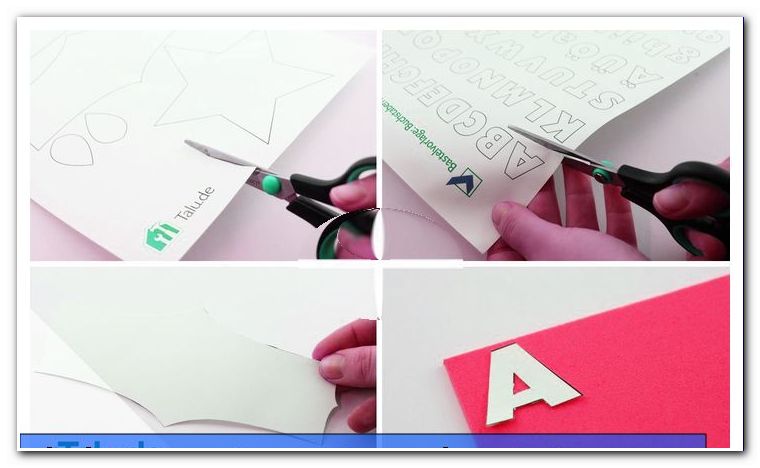
Click here: To download the craft template
Click here: To download the letter template
Step 2: Pick up any sponge rubber and transfer the outlines of the template with a ballpoint pen. Then cut out the shape.
Hint: Forms can be circles, squares, hearts, stars, clouds, etc.
Step 3: Write the name or the statement on the doorplate with a well-visible marker color matching the base.
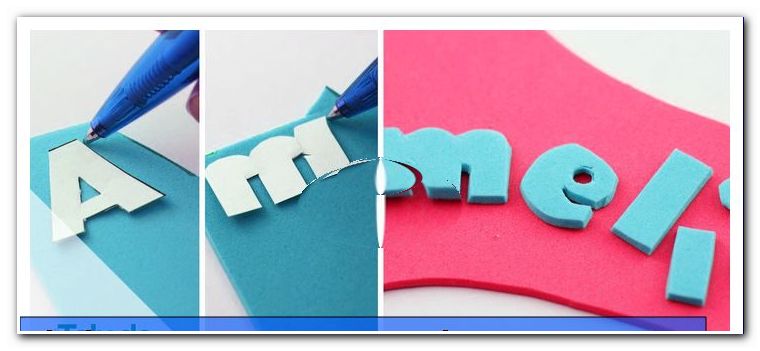
Tip: If you cut out the letters you need from foam rubber, you can stick the name on it as well. As an alternative to a name, classics such as "Do not enter!", "Careful: biting!" Or similar "sayings" can be written or stuck to the foam rubber plate. Transfer the outlines of the letters mirror-inverted to the foam rubber - in this way, the pen strokes end up on the adhesive side.
4th step: Or transfer the targeted motifs from our templates with a light colored pencil or white chalk on sponge rubber (not the base plate!) And cut them out.
5th step: Glue the sponge rubber parts to the main plate. You enjoy absolute freedom of design.
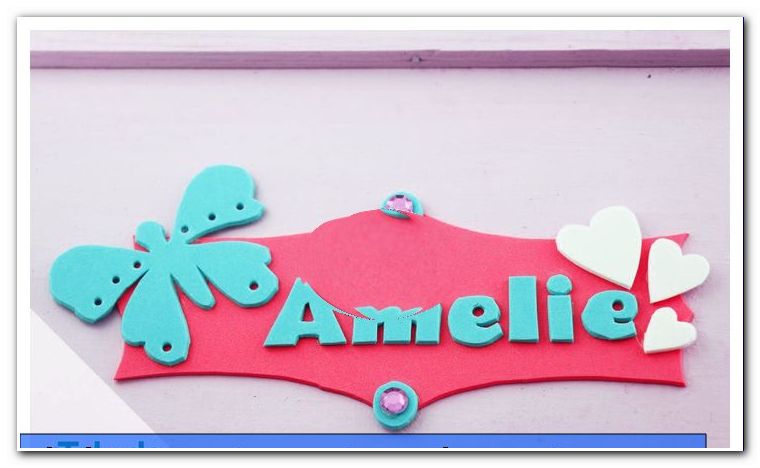
Step 6: Glue a picture hanger on the back of the plate. With it you can easily hang the now completely finished door plate.
Tip: The crafting of foam rubber door plates is a colorful and very simple endeavor, which is particularly suitable for common crafting afternoons with children.
Gingerbread man made of foam rubber
You need this:
- our templates
- Sponge rubber in various colors
- pen
- scissors
- Glue
- colored pencils
- possibly punching pliers
manual
Step 1: Print our templates on paper and cut them out.
Click here: To download the craft template
Step 2: Transfer the outline of the gingerbread man with a pencil to a piece of foam rubber in light brown or dark brown. Cut the shape clean with scissors.
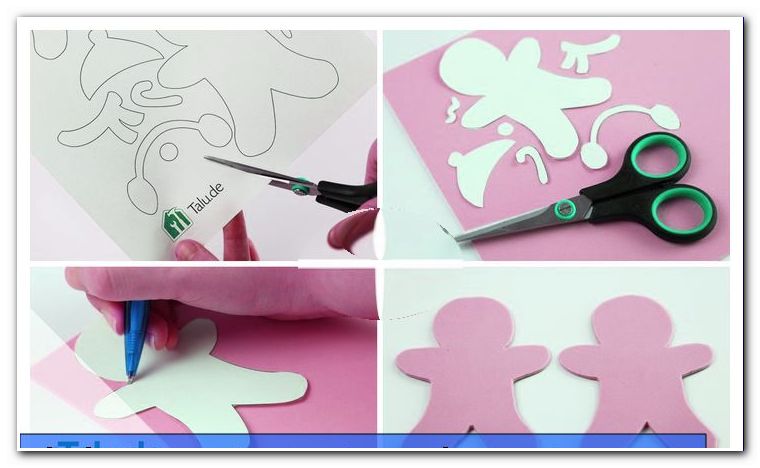
Step 3: Then transfer the hat, scarf or ear warmer to the white sponge rubber and cut out these pieces as well. Afterwards, the individual elements are glued to the body with glue.
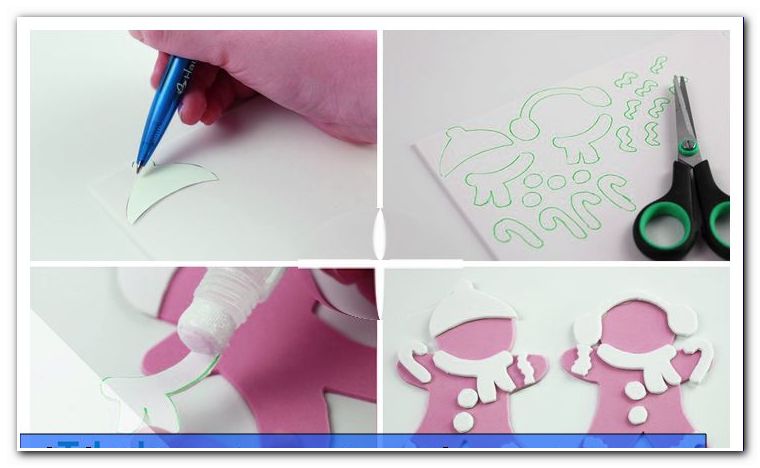
4th step: This is followed by painting. Make the gingerbread man a friendly face. Since we used white sponge rubber, you can now paint all the elements as you like. Done is the sweet gingerbread man.
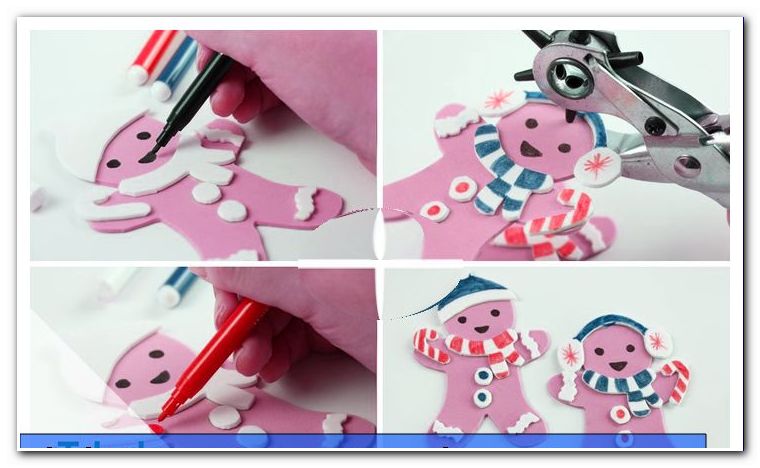
Tip: With a punch you can also punch a hole in the gingerbread man - so he can also hang on the Christmas tree.
Easter bunny made of foam rubber
You need this:
- Foam rubber in white, pink and brown
- our templates
- Funliner in white (eg from Marabu)
- pencil
- bright colored pencil or white chalk
- scissors
- contours scissors
- craft glue
- if necessary needle
- if necessary thread
manual
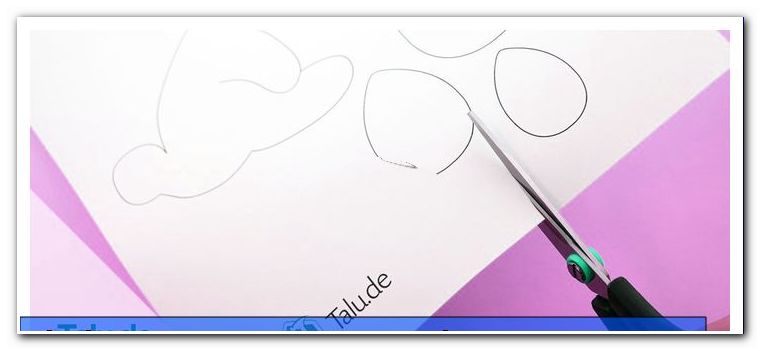
Step 1: Print our originals on paper and cut out the individual elements cleanly.
Click here: To download the craft template
Step 2: Transfer the templates to the foam rubber sheet with a pen.
Tip: If you transfer all parts, except the body, to foam rubber twice, both sides look nice at the end.
Step 4: Cut out everything.
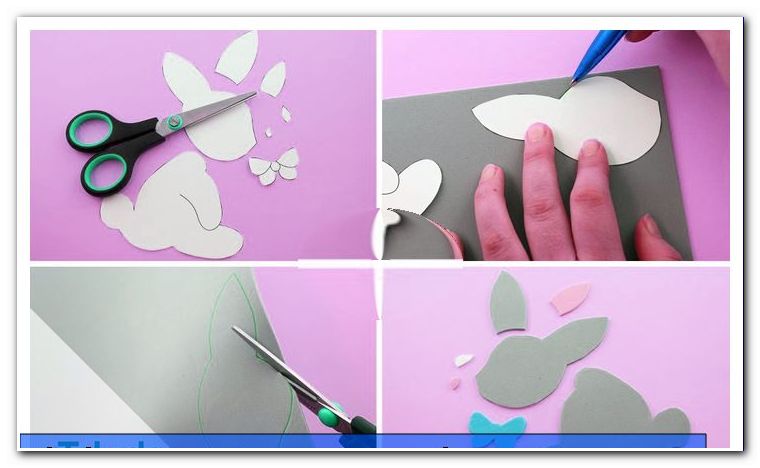
Step 5: Glue the items together to your Easter Bunny. You can orient yourself by our pictures.
Step 6: Stick the two eggs together correctly.
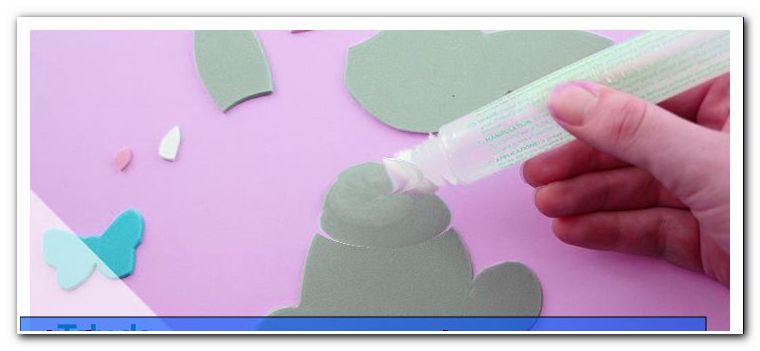
Step 7: To decorate the eggs, use contourscopes to cut out contrasting stripes of foam rubber and glue them on.
Step 8: Capture visually crucial details such as the lines separating bodies and paws from each other with a pen.
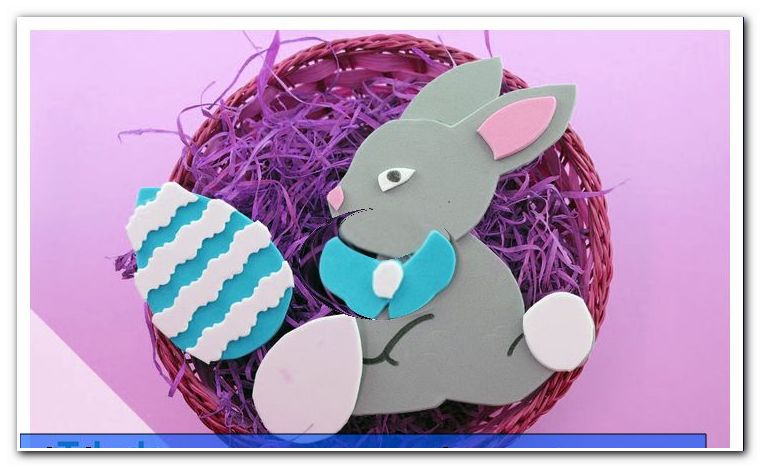
With needle and thread, you can also hang the Easter bunny and the Easter eggs in the window.
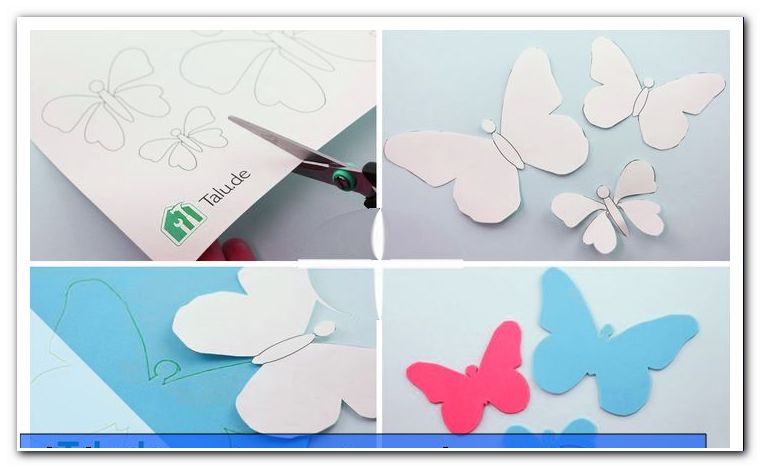
Butterflies made of foam rubber
You need this:
- Sponge rubber in different colors
- our templates
- satin ribbon
- bright colored pencil or white chalk
- scissors
- Glue
- Lochzange
manual
Step 1: Print our templates on paper and cut them out.
Click here: To download the craft template
2nd step: Transfer the outlines of the stencils to sponge rubber in the desired colors. Use a light colored pencil or white chalk.
Step 3: Cut the butterflies out of the foam rubber sheets.
Step 4: Give your butterflies attractive lace patterns. For this purpose you only need a punch. With the utensil you can push out the individual holes.
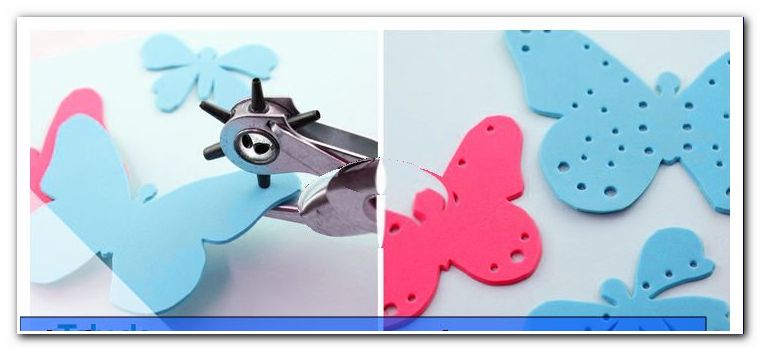
Tip: Think in advance which patterns the individual butterflies should have. We advise you to operate with different hole sizes to make the animals more versatile.
Step 5: Cut a matching satin ribbon to the length of the window to decorate the butterflies.
Step 6: Glue the butterflies criss-cross on the satin ribbon. There are no rules - the main thing is that the big picture looks decorative at the end. Finished!

Tip: The more the butterflies vary in size, the more lively the window decoration will be.
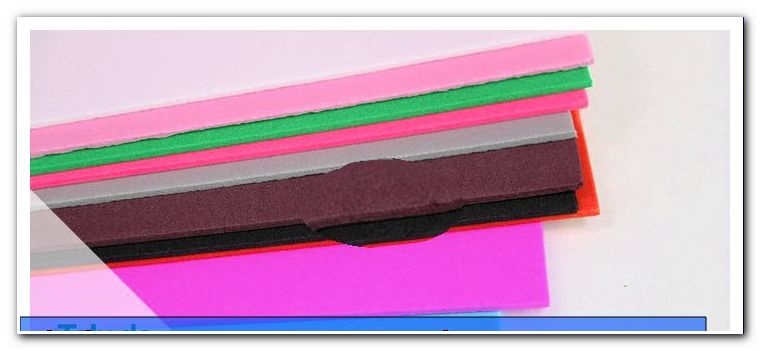
Info - crafts with foam rubber
Sponge rubber is an enormously inexpensive material. For ten to 20 different colored plates in the set you pay depending on the manufacturer about three to 16 euros.
When transferring the paper or cardboard stencils to sponge rubber, you should not use a pencil. Because the craft material reacts very sensitively, so that you would find ugly dark edges after cutting in some places. In this respect, it is recommended that instead of the pencil rather a light colored pencil or - even better
Use white chalk. The latter has the great advantage that it can easily be scrubbed afterwards with a small brush without leaving any residue behind.
All of our instructions for crafting sponge rubber have a low level of difficulty. This means that the pretty elements are easy to implement even for newcomers in the craft world. Furthermore, all accessories can be made with or directly by children from about five to six years of age (if necessary under parental or grandparent supervision and with explanations or step-by-step instructions).
The time required for the various crafting activities is limited. In a few hours you can create some motifs from sponge rubber. So the employment is also suitable for days that do not offer too much freedom.
Whether you're getting started on your own or involving your kids, making sunflowers and Easter bunnies, Christmas trees and hearts, or doorplates and butterflies made of foam rubber
We wish you a lot of fun with the pleasant foam material between your fingers and the creation of golden decoration elements!