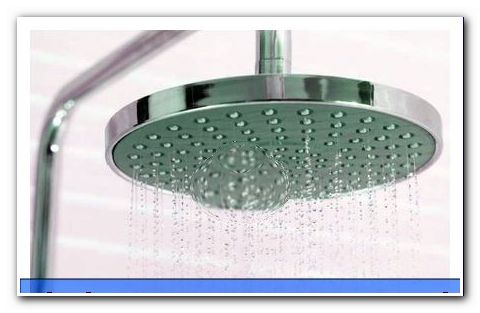
Clean shower head - so descale and remove mold

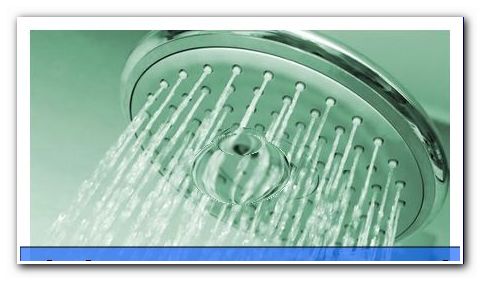
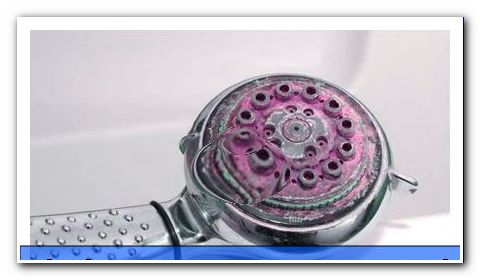
Basically, limescale and mold on the shower head are not serious problems. This is only the case when the calcium deposits increase and clog the perforated screen. In this case, the water does not flow as desired from the shower. Some holes are completely blocked and others do not allow the water to flow properly. In these cases, it can happen that individual jets of water splash uncontrollably through the bathroom and have to be wiped off after showering. Possible mold infestation has the disadvantage that, on the one hand, it does not look nice and on the other hand it can be harmful. Although the amount of mold is low, it should nevertheless be avoided.
Descaling extends the life of the fittings
Neither lime nor mold should remain permanently on the shower head. An infested shower does not look nice and reduces the showering pleasure. In the household, therefore, a regular cleaning must be carried out to fight both pollution quickly. The calcification of the shower head always depends on the quality of the water in the household. Of course, a strongly calcareous water leaves more residue than a purer water. Also, in a well-ventilated bathroom, less mold will be created. Finally, a drying of the shower fittings helps after their use, so that can not be caused by water deposits mold. However, once shower heads have become dirty, thorough descaling must be carried out, which is described below.

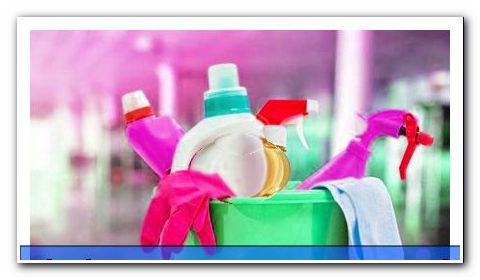
Cleaning process in detail
This is needed:
- Lime remover or vinegar
- bucket
- pipe wrench
- screwdriver
- drying cloth
- water
- Disposable gloves
Tip: The decision whether lime remover or vinegar is taken should definitely be positive for the vinegar water in chrome faucets, as chemical lime removers attack the metal.
Step 1:
In a first step, the shower head must be disconnected from the hose. This is done by a simple twisting by hand. Should this lead to problems, a pipe wrench can be used to help the hose dissolve reliably. In the rarest cases, the shower head comes directly from the wall. Then a rosette must be loosened beforehand, so that the connection to the hose is open. Then the hose can be turned off again by hand.

Step 2:
In the next step, it must be checked whether the shower head can be disassembled into its individual parts. Although cleaning is also possible on the whole shower, but can be better decalcify parts and clean of mold. If a small screw is found, it is possible to disassemble. If this is not possible, continue directly with step 4.
Tip: If the shower is regularly ventilated, dried after showering and kept clean, it is usually sufficient to clean the shower as a whole.
Step 3:
Disassembling a shower head is easily possible, especially with older models. Mostly a small screw can be found on the perforated screen, which can be opened with a screwdriver. Then the complete housing can be taken apart. New models have hidden this screw, so first a cover must be pried, which is also possible with a screwdriver. The hardest step at this point is finding the screw. After disassembly, the items can be cleaned with water from the coarsest dirt.
Step 4:
The cleaning agent must be prepared, first of all the decision should be made as to whether vinegar or a descaler should be used. The properties of the products are completely identical. Maybe a chemical product is slightly faster than the home remedies, but in most cases more expensive and not environmentally friendly. In addition to vinegar, there is also a vinegar essence, which acts faster because the acidity is higher. In addition, lemon juice can be used, which also has the necessary acidity. Which detergent is used is a matter of taste, as they all serve their purpose. Only chrome faucets should not be cleaned with descaler, as the metal could be attacked. Descalers are prepared according to the package instructions and conventional household vinegar should be mixed with water at a ratio of 1: 1.
Step 5:
Once the detergent has been prepared, it is poured into a bucket or bowl. Subsequently, the shower head or all its individual parts are given. How long the following duration of action should last depends on the type of detergent and the degree of soiling. However, a too long exposure time does not cause any damage so that a longer time can be selected without any problems. If it has been decided on the type of detergent for vinegar, it makes sense to cover the bucket, as the sour smell will be in the room for a longer time. If lime is no longer detectable through the cleaning agent, it is possible to start with step 6.
Tip: Ventilate the room well during treatment so that the vapors of the detergents can escape.
Step 6:
After a sufficient exposure time, the shower head or its individual parts can be removed from the detergent. To avoid contact with the skin, it is better to do step 6 with disposable gloves. The removed parts are then rinsed with plenty of water so that no cleaning agents remain on the fittings. Finally, the items are reassembled with the screwdriver and the shower head can be hung up. The cleaning process is hereby finished and metal and plastic shine again in a new shine.

Another trick
If the shower head is not, or only with great effort, to be detached from the wall, the following trick for descaling can be used:
A balloon is carefully filled with detergent. Then this is pulled over the shower as a whole. It is important to ensure that no liquid can escape. Leave the balloon on the shower head for a few minutes until the detergent is effective. After this treatment, the balloon can be removed and the shower fittings washed off.
Tips for quick readers:
The most important tips for decalcifying shower heads are given in the following list:
- Descaling and mold is caused by water residues
- Always dry the shower fittings
- Cleaning easily possible in own work
- If possible, disassemble the shower head into individual parts
- Screw often hidden in the perforated screen
- Decide on decalcifier or vinegar
- Properties of cleaning agents identical
- Exposure time depending on the degree of pollution
- Ensure good ventilation in the room
- Get items with disposable gloves from detergent
- After cleaning, rinse with plenty of water
- Dry individual parts
- Assemble shower head and hang up