Sew children's tool belts themselves - for strong boys and girls
- Material and patterns
- Tool bags: sewing instructions
- Sew on the fan bag
- Sew loop bag
- Sew zipper pocket
- Sew tool belt
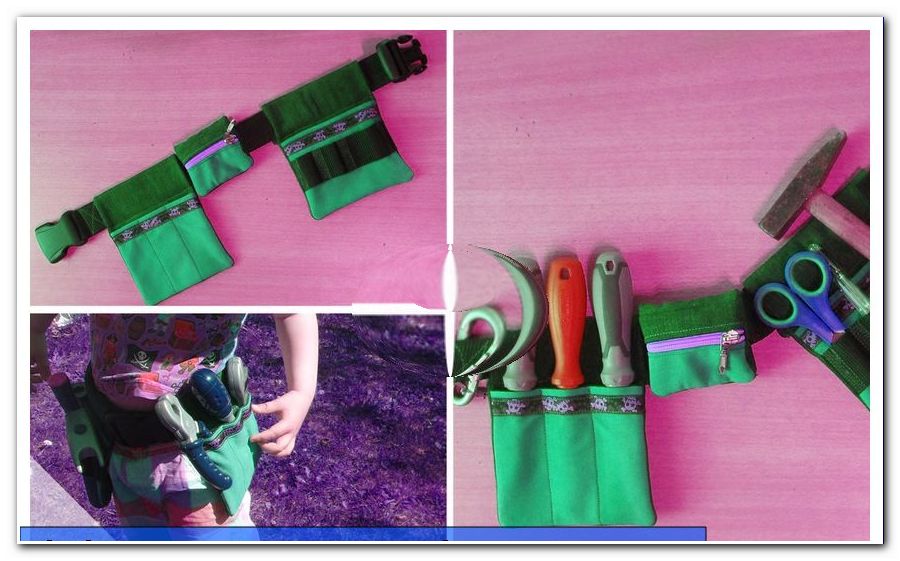
Spring is coming and with it a very late Easter. If you have not yet found a suitable gift for your children, today we will give you a last-minute sewing idea: the children's tool belt. In addition to tools, it also accommodates many other things such as tools for gardening, craft materials or collected treasures from the last walk.
In order for your child to enjoy the new tool belt for as long as possible, I have designed it to be flexible so that the individual elements can be removed and replaced. For example, you can also remove the two tool bags and has with the zipper pocket a purse that can not lose the child.
Quick and easy to self-sewn children's tool belt
Difficulty level 2/5
(suitable for beginners)
Material costs 2/5
(depending on fabric and material selection between € 5, - from the remaining utilization and € 35, -)
Time expenditure 2/5
(including pattern depending on the exercise about 2-3 hours)
Material and patterns
The material selection and the amount of material for the tool bags
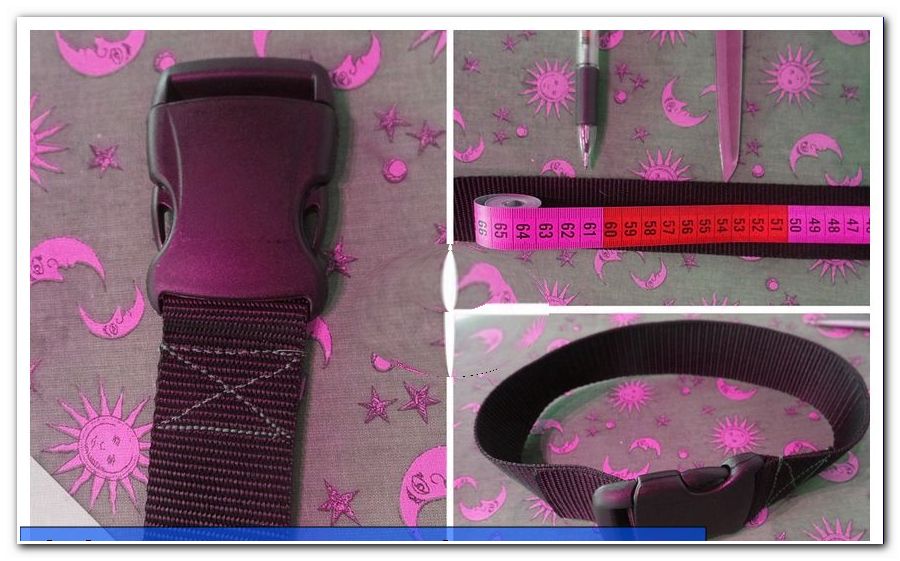
Such a tool belt has to endure a bit, especially if it is intended for children. Therefore, you need a sturdy fabric that you reinforce. But it should also look nice, so combine it with something Motivstoff and a woven band of your choice. In addition, for safe and comfortable wearing even the widest possible webbing is missing including matching closure.
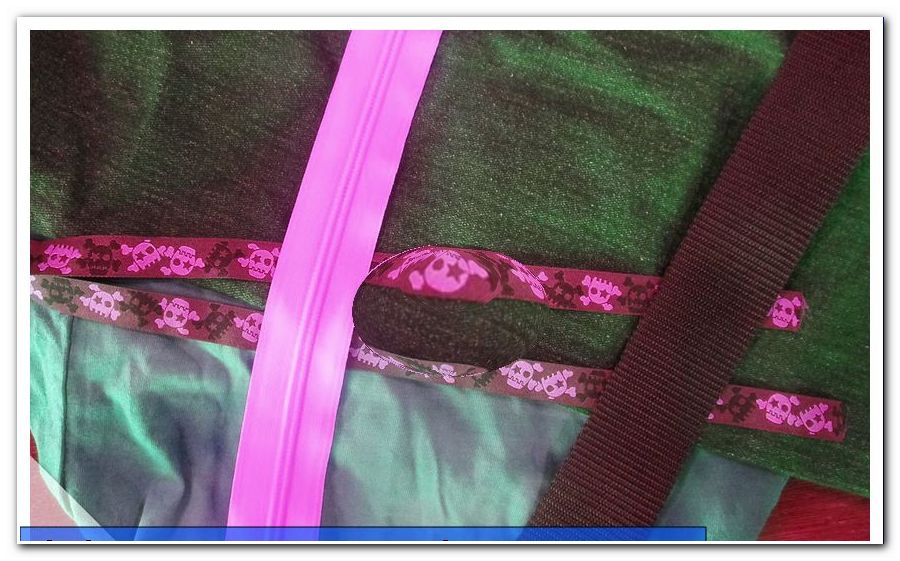
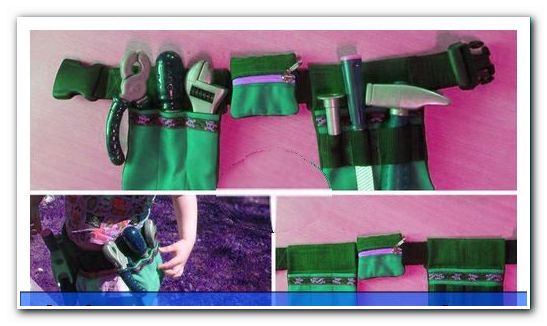
As a robust fabric, I've upcycled an old pair of jeans and reinforced them with non-woven fabric. I also ironed on an old T-shirt of my son in blue-green (strictly speaking, no motif fabric). As a decorative element, I opted for a weave band with skulls for the pirate style, which is just totally in demand with my miniman. The woven band is four inches wide, the plastic closure. Why "> 1 of 2 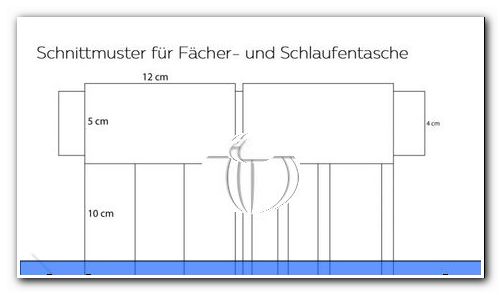
Here you can get creative and adapt everything to your needs or tools. My sketch and implementation should give a small impetus and give you a sense of how the correct dimensions are calculated. Of course, you can implement the tool belt 1: 1 as I do. My combination is simply practical as it offers many different possibilities.
Tool bags: sewing instructions
Sew on the fan bag
I start with the first bag in which, for example, three screwdrivers can be inserted. For this I need a bag with three compartments.
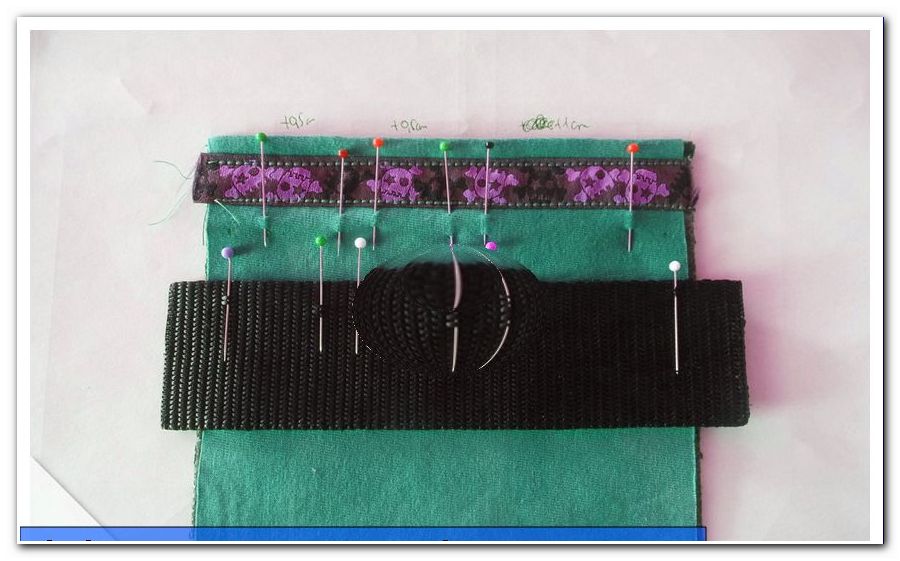
The compartments should begin below the webbing and be 10 cm high. The width I chose 12 cm, since 4 cm per screwdriver are sufficient. Since the webbing is 4 cm wide, I calculate a height of 5 cm for the belt loop. The sketch shows both the webbing and the dividing seams. The belt loop I want to fold up and sew on the back, so I have to consider it for my cut. In addition, I calculate 0.7 cm seam allowance at all necessary points.
Cutting the fan bag:
2x denim with the dimensions 13.4 x 22.4 (carrier incl. Loop)
1x denim with dimensions 13.4 x 11.4 (pocket inside)
1x decorative fabric with the dimensions 13.4 x 11.4 (pocket part outside)
Tip: Although denim is very durable, I recommend to reinforce all parts with ironing fleece. If you are using real tools, you can also sew in another denim layer at the bottom.
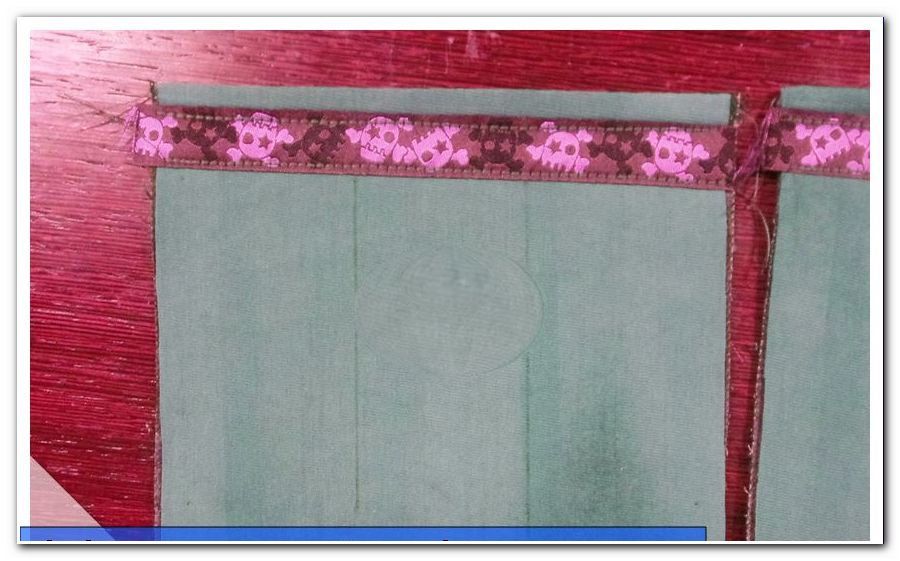
Sewing the fan bag:
Optionally, you can already enter the important markers for the subject division of the pattern beforehand, but this can also be done in the second step. Now put the smaller pieces of cloth right to right (ie with the "beautiful" fabric sides together) and sew them together with a triple straight stitch. Fold the two sides apart and fold them back exactly at the seam.
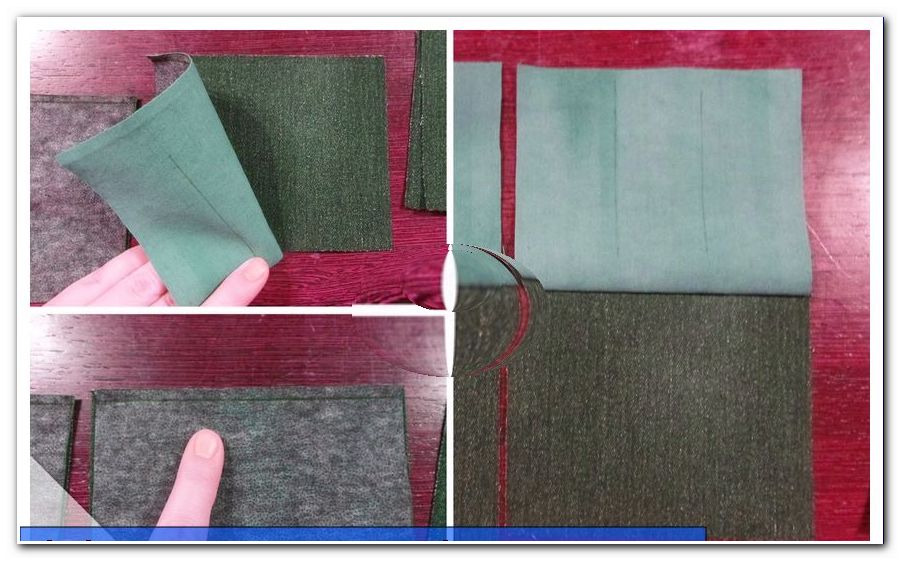
Iron this edge, it will remain visible. Attach now - if desired - a suitable woven ribbon.
Tip: For the whole project you should ideally use the triple straight stitch, because it is particularly robust.
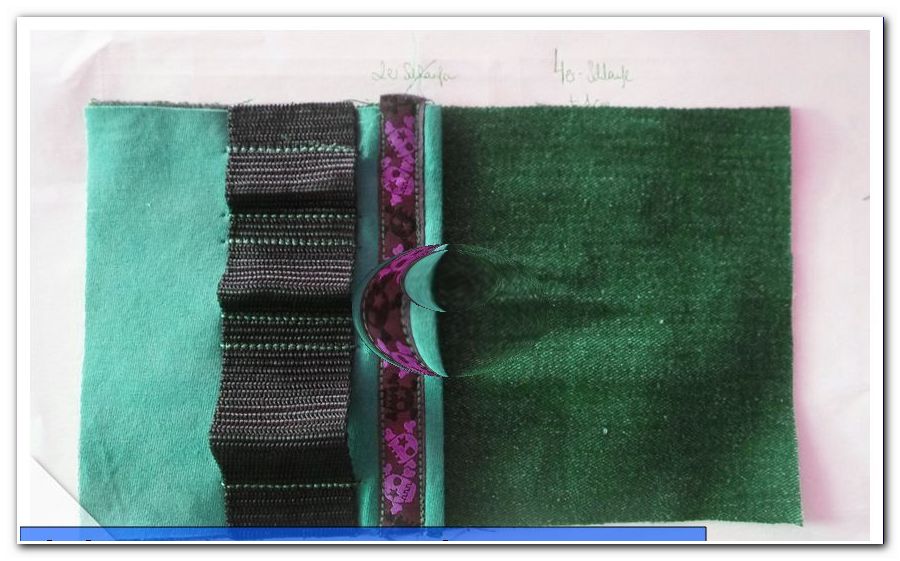
Place the finished piece with the selvedge up on one of the large pieces of fabric (right side up) so that the bottom corners are exactly on top of each other, and pin tight all the layers. Now sew the fan divisions. Now place the second large piece of fabric right over on the right, pin all the edges and, if necessary, the corners firmly and mark on the top the seam end points for the turning opening.
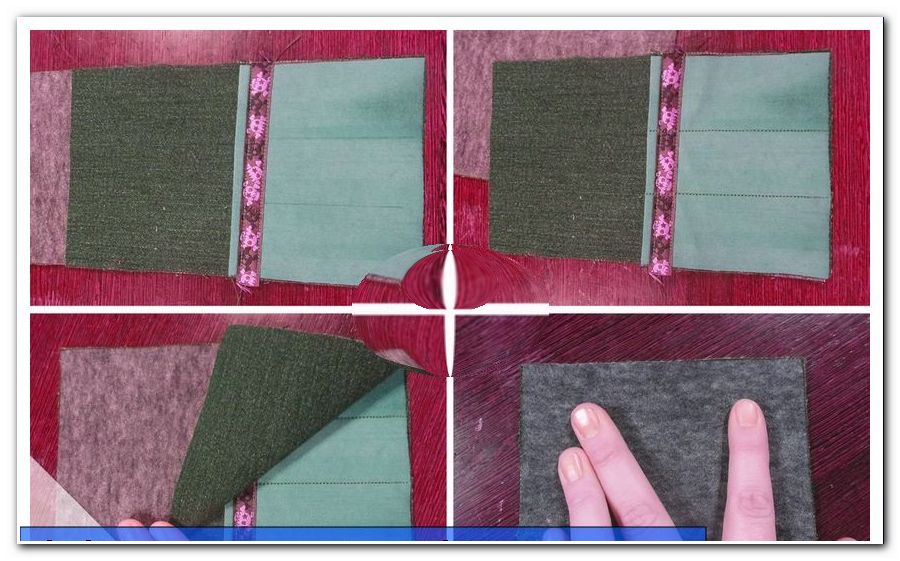
Sew around once (except the turn-around opening) and trim the seam allowances in the corners at an angle.

Turn the bag over, make the corners as good as possible, and iron in the seam allowances in the turn opening. Stitch all four layers of fabric tight-edged over the entire side or at least in the area of the turning opening.

Take your strap and fold the top of the bag over to the back. The tape should not be too tight, so you can easily thread it in and out later. But it should not sit too loose, so that the belt remains stable. Stick the correct distance, remove the webbing and sew once through all fabric layers.
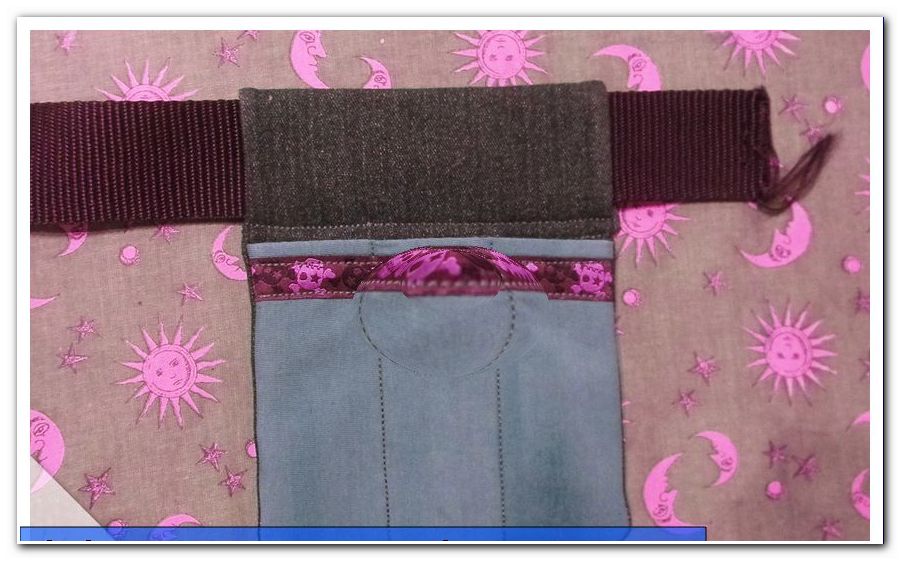
Tip: To prevent the webbing from fraying, carefully weld the ends to the flame of a lighter. To do this, move the flame very quickly and briefly along the edge two or three times.
Sew loop bag
The second bag is suitable for all items that are wider at one end than the other, so for example also screwdrivers, hammer, scissors, pen and more.
To make beautiful loops, of course, the required webbing must be a little wider and sewn with a loop. For my bag, I added 1cm for the large loop and 0.5 cm for the small loops. Just try how much space your tool needs and vary your loops accordingly.
Cutting the loop pocket:
2x denim with the dimensions 13.4 x 22.4 (carrier incl. Loop)
1x denim with dimensions 13.4 x 11.4 (pocket inside)
1x decorative fabric with the dimensions 13.4 x 11.4 (pocket part outside)
1x webbing with 4cm width and 15.4cm length (including the loops and seam allowance)
Sew the loop pocket:
Up to and including the decoration with the woven band (if desired), you can do the same here as with the fan bag. Sew the smaller fabric piece decorated with woven ribbon onto one of the larger pieces of fabric on the top edge of the woven ribbon (the lower corners meet exactly).
On the webbing, mark the distances between your seams and the loop additions using pins.
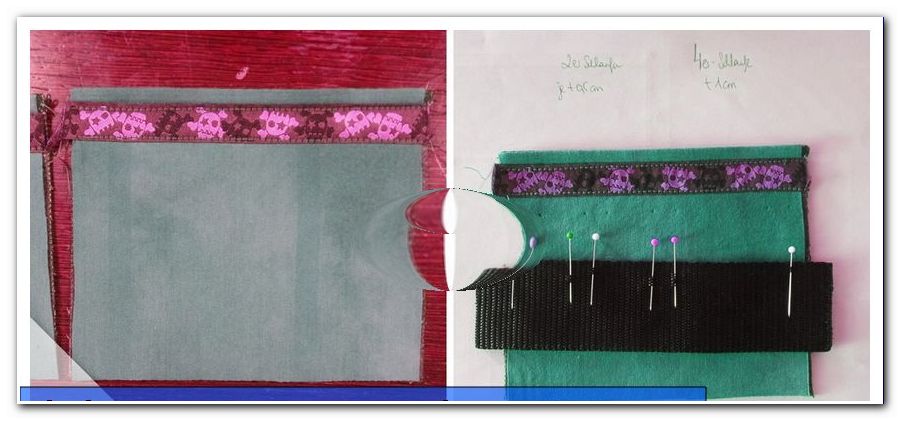
Mark now also the seams on the decorative fabric by means of pins at the height of the woven tape.
You will see that the pattern is now a little narrower than on the webbing. Now place the first marking on top of each other and insert all fabric layers. Sew the first seam, prepare the second one (with a loop), put it firmly in place and also sew it off. Continue until all seams are in place.
Tip: For a better grip, sew over the loops with a wide zigzag or decorative stitch.
Place the second large piece of fabric right-to-right over it like in the compartment pocket, pin everything down and sew up to the turn-up opening in the upper area, shorten the corners, turn, press the seam allowance inwards, sew them up and adjust the loop the webbing on.

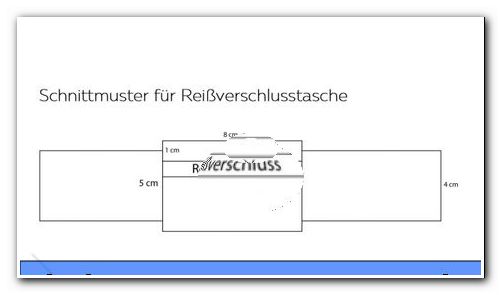
Sew zipper pocket
This bag is extremely versatile. I particularly like the opportunity to carry them without the other two bags as a purse. So the children have both hands free and still can not lose them.
Cutting the zipper pocket:
2x denim with the dimensions 17, 4 x 9, 4 (carrier part incl. Loop)
1x denim with the dimensions 9.4 x 2.9 (pocket top on the outside)
1x decorative fabric with the dimensions 9.4 x 2.9 (pocket top inside)
2x decorating fabric with the dimensions 9.4 x 4.9 (pockets bottom inside and outside)
1x zipper at least about 12cm long with a 8cm wide pocket
Sew the zipper pocket:
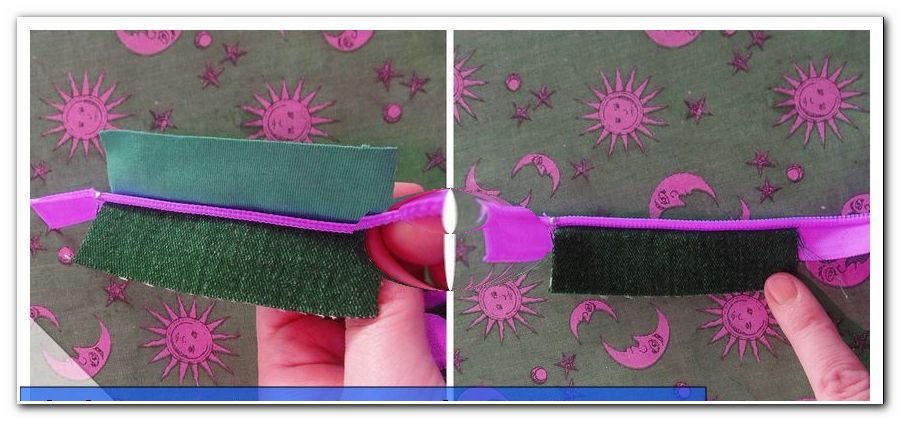
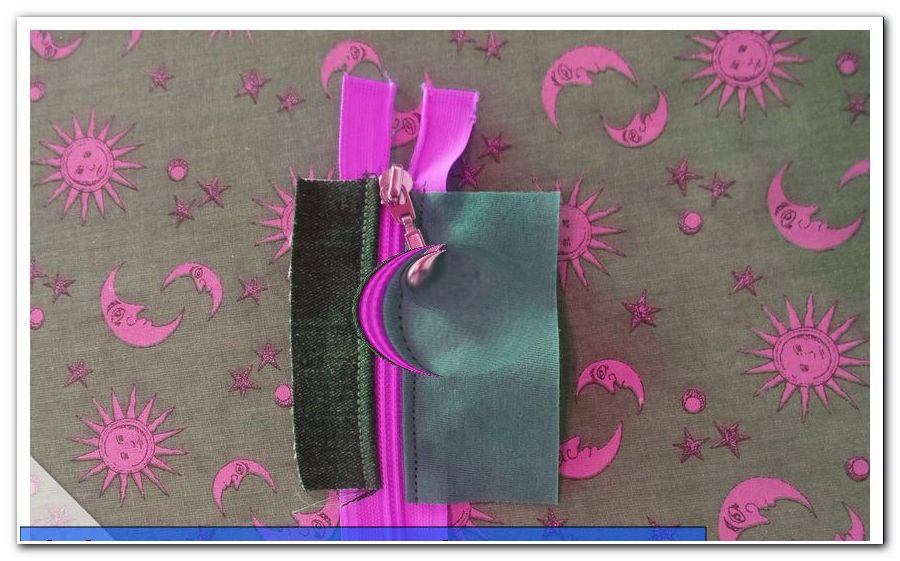
Lay the zipper with the zipper open in front of you and put the two outer parts with the right side down as shown in the picture. Change your sewing machine to the zipper foot and quilt it with a square edging. Turn on the zipper and sew the inside parts as well.
Fold the fabric pieces out from the zipper and iron the edges flat.
Tip: Be careful when ironing zips with plastic teeth! Do not iron too close to the teeth, they can melt!
Place the open edges exactly on top of each other, put them firmly in place and quilt all the layers on the zipper with a tight edge - do the same on the opposite side.
Now it gets a bit tricky:
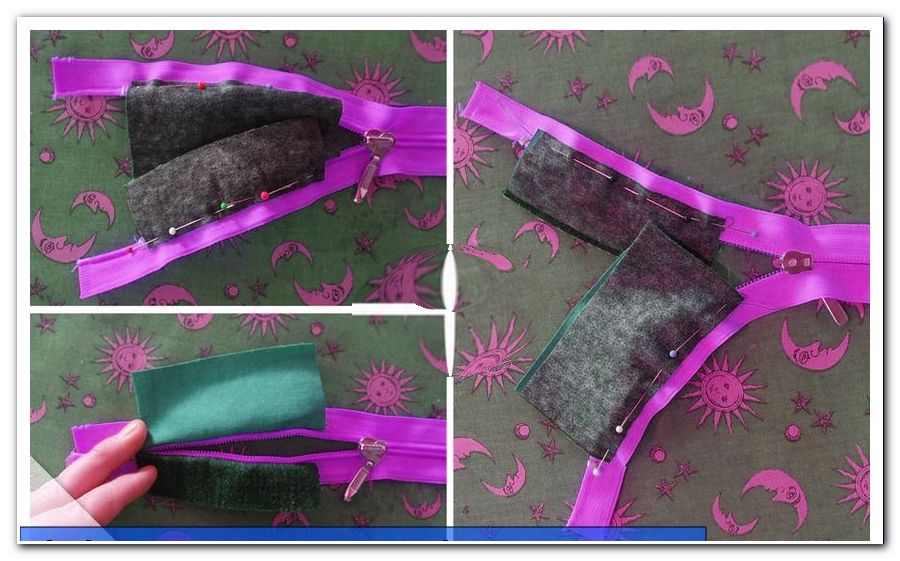
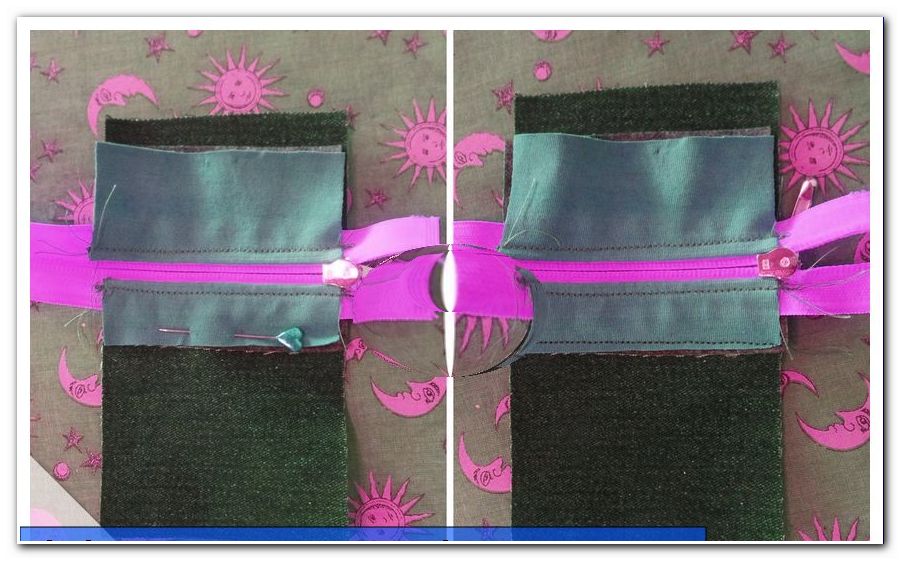
Lay your zipper on one of the larger pieces of fabric, as it should be later, so the larger piece of fabric right side up, on the zipper with zipper down, the lower edges are flush. At the top of the zipper part, fold 0.7 cm seam allowance backwards. Now fold the complete zipper part upwards without slipping and attach it to the seam allowance. Sew now with seam allowance distance both parts together.
Fold down the zip fastener, OPEN THE ZIP TO HALF, place the second large piece of fabric over it to the right, ...
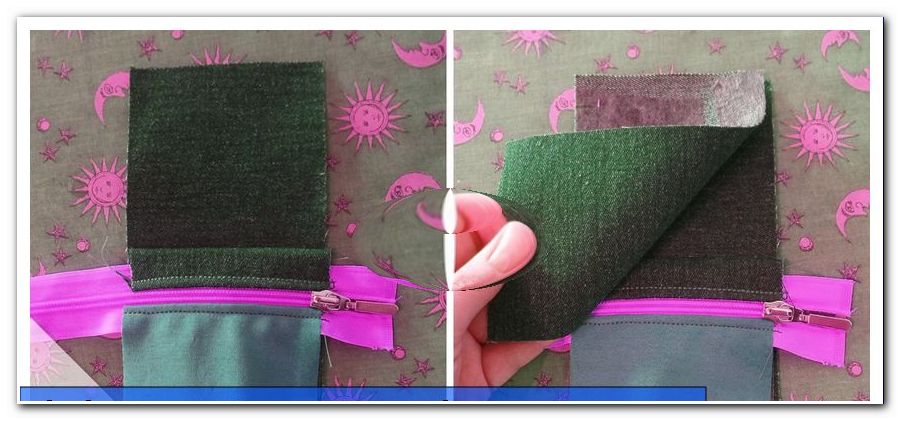
... align all edges, pin them down and sew all layers together leaving no seam allowance.
Cut back the seam corner corners and all unnecessary fabric and zipper parts, then apply and shape the corners nicely.
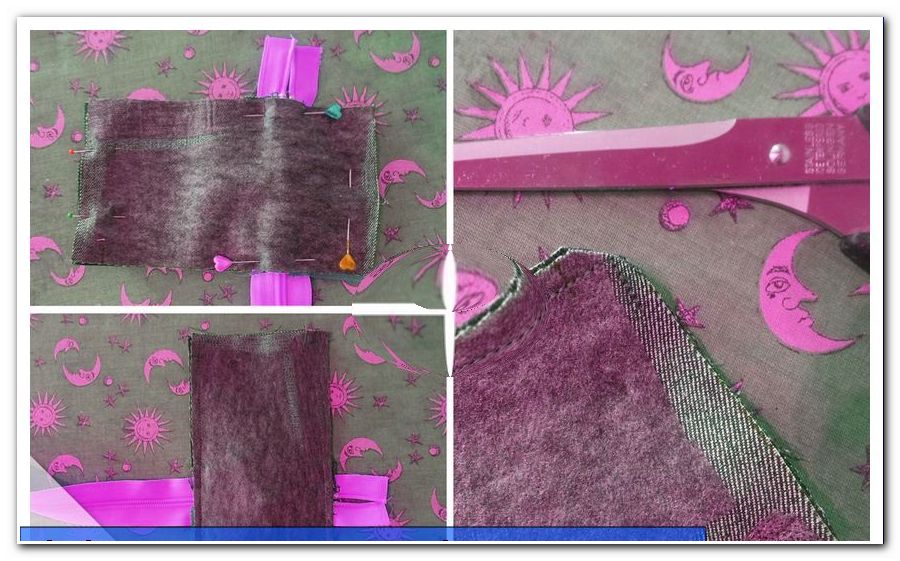
Iron and close the turning opening. Fold the top back and close the loop with a stitching on the machine or (much nicer) by hand with a ladder seam.

Sew tool belt
Measure the hip circumference (the widest part) of your child. With me that is 53 cm. Make a generous round. In my case to 61 cm. If the belt should fit over many years, expect 15-20 cm to the hip circumference.
Thread one side of the webbing through the first fastener and sew it once close to the fastener, once at the end of the webbing and twice diagonally. Thread your pockets in the desired order on the strap and slide the end into the second part of the fastener. Adjust the length between the waist and hip directly to your child.
And done!
The twisted pirate